A year ago, I received a box from my dad filled with pieces of a planter broken during transit. After receiving a refund, he figured I could find a fun use for the pieces. In true Anna fashion, however, the box sat in my basement for months, haunting me every time I walked by on my way to do laundry. While I was scheming outdoor projects during the dead of winter, I came across a slew of mosaic tables and knew that would be the perfect use for these pieces. This project isn’t difficult at all, and below are the steps I took to achieve my results.
Supplies
- Mosaic tiles – I’m a fan of repurposing thrift store plates, or anything broken to reduce consumption. I did find these tiles that I would use in a future iteration if I didn’t want to go through the procurement phase.
- Table – This is a standard Ikea side table. I’m sure there are lots of options on FB Marketplace as well.
- Tile adhesive – I had this on hand, but any adhesive would work.
- Tile grout – Again, I had this on hand, but might try an epoxy grout next time.
- Grout sealer – I wanted a sealer that was rated for outdoor use, and penetrative so the grout can breath.
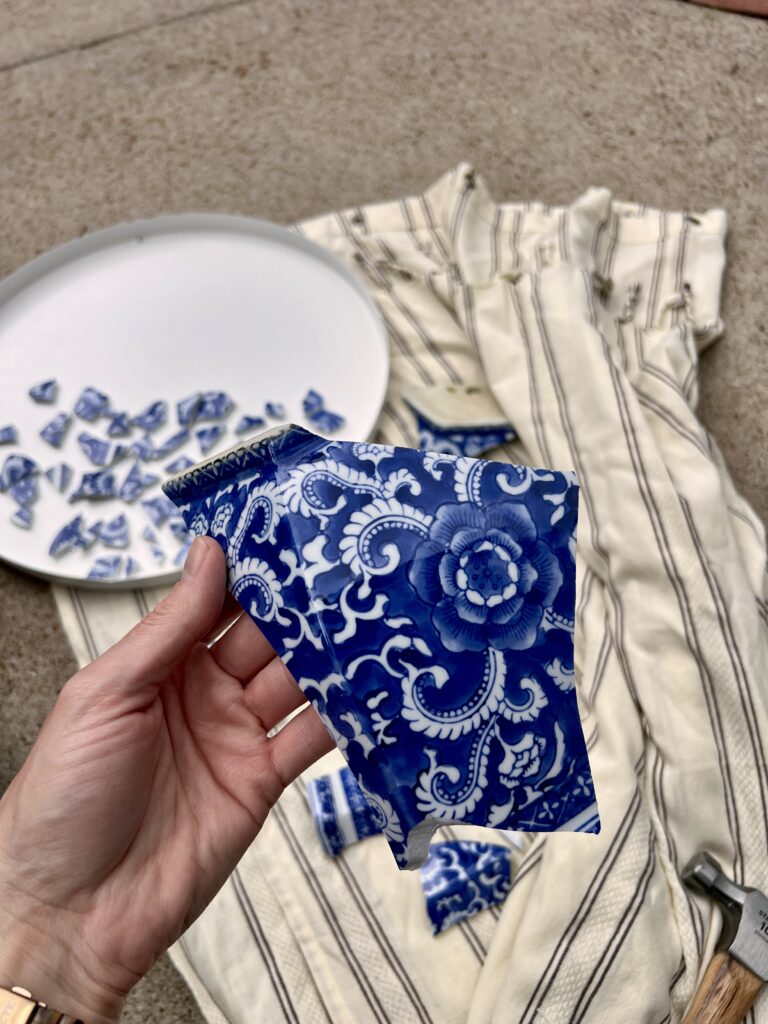
I began by breaking down the planter into smaller pieces I could arrange on the tray of the table. I found an old shower curtain and sandwiched the pieces between fabric layers. Any fabric will do, so long as there is a bit of cushion between the porcelain and metal of the hammer. There is a bit of trial and error to ensure that the pieces break into just the right amounts, but the unpredictable shapes that emerge is rather exciting.
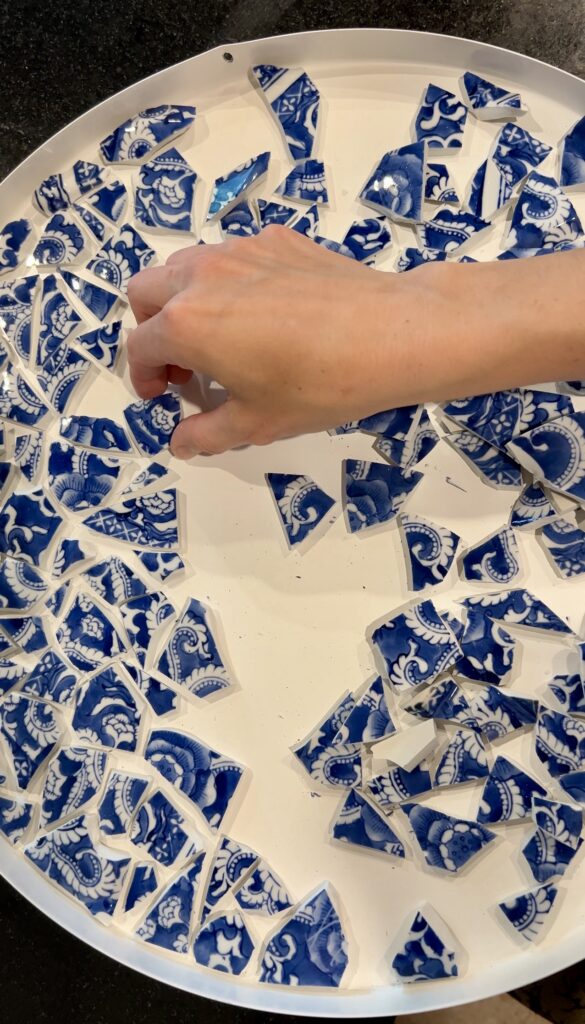
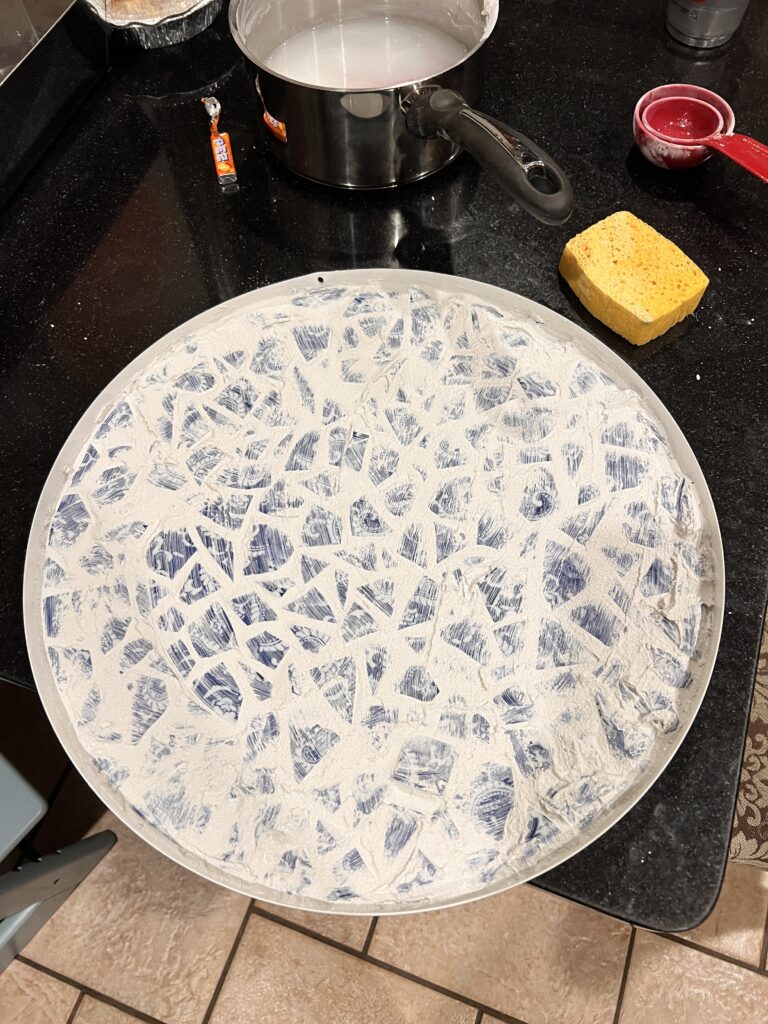
Once the planter was broken down, I gathered the fragments and started to arrange them in a pattern as a dry fit. This step is the most time-consuming of the project, but also the most rewarding. Puzzles are my jam. When I was satisfied with the layout, I glued each piece to the tray and let it dry for a day before applying the grout. Removing the grout haze was a bit more tedious due to the uneven surface of the tiles.
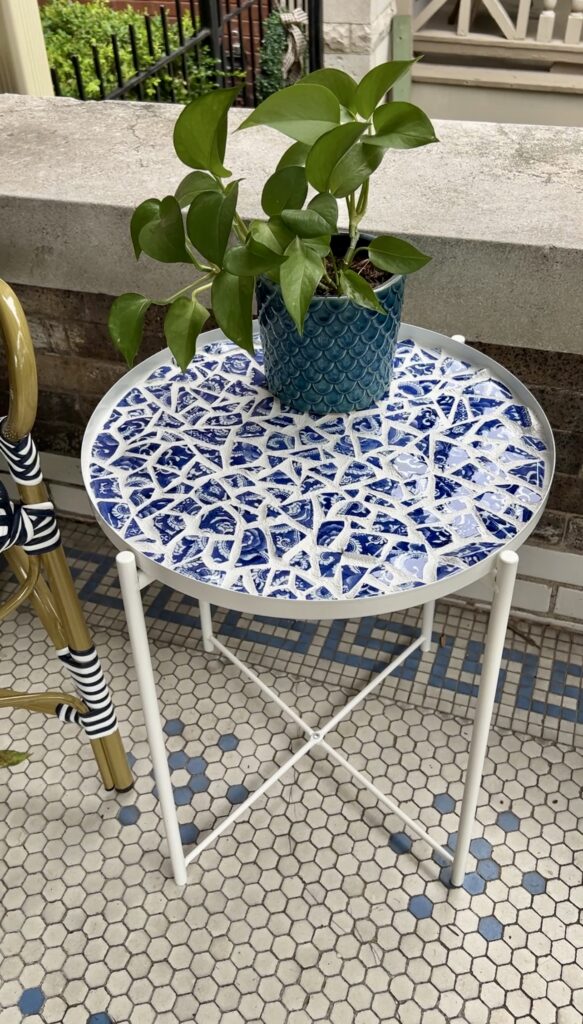
Sealing grout is especially important if the table will be kept outdoors, and since my grout was white, I wanted to be cautious. I made sure to use a sealer rated for outdoor use and capable of penetrating the grout so it could breath. I meticulously applied four coats to each grout line with a brush, but in hindsight, I would have used a sponge to speed up the process. After allowing it to dry for 24 hours, the table was ready to take its place on the porch. This was a gratifying project, and so simple to create. I’ve already added a couple more to my back yard to do list!